Table of Contents
- Why Autopay Is Worth the Setup
- Understanding the Types of Autopay Options
- Full Balance vs. Minimum Payment
- Fixed Amount
- Custom Schedule
- Step‑By‑Step Guide to Setting Up Autopay
- 1. Log Into Your Online Banking Portal
- 2. Navigate to the “Payments” or “Autopay” Section
- 3. Choose Your Funding Source
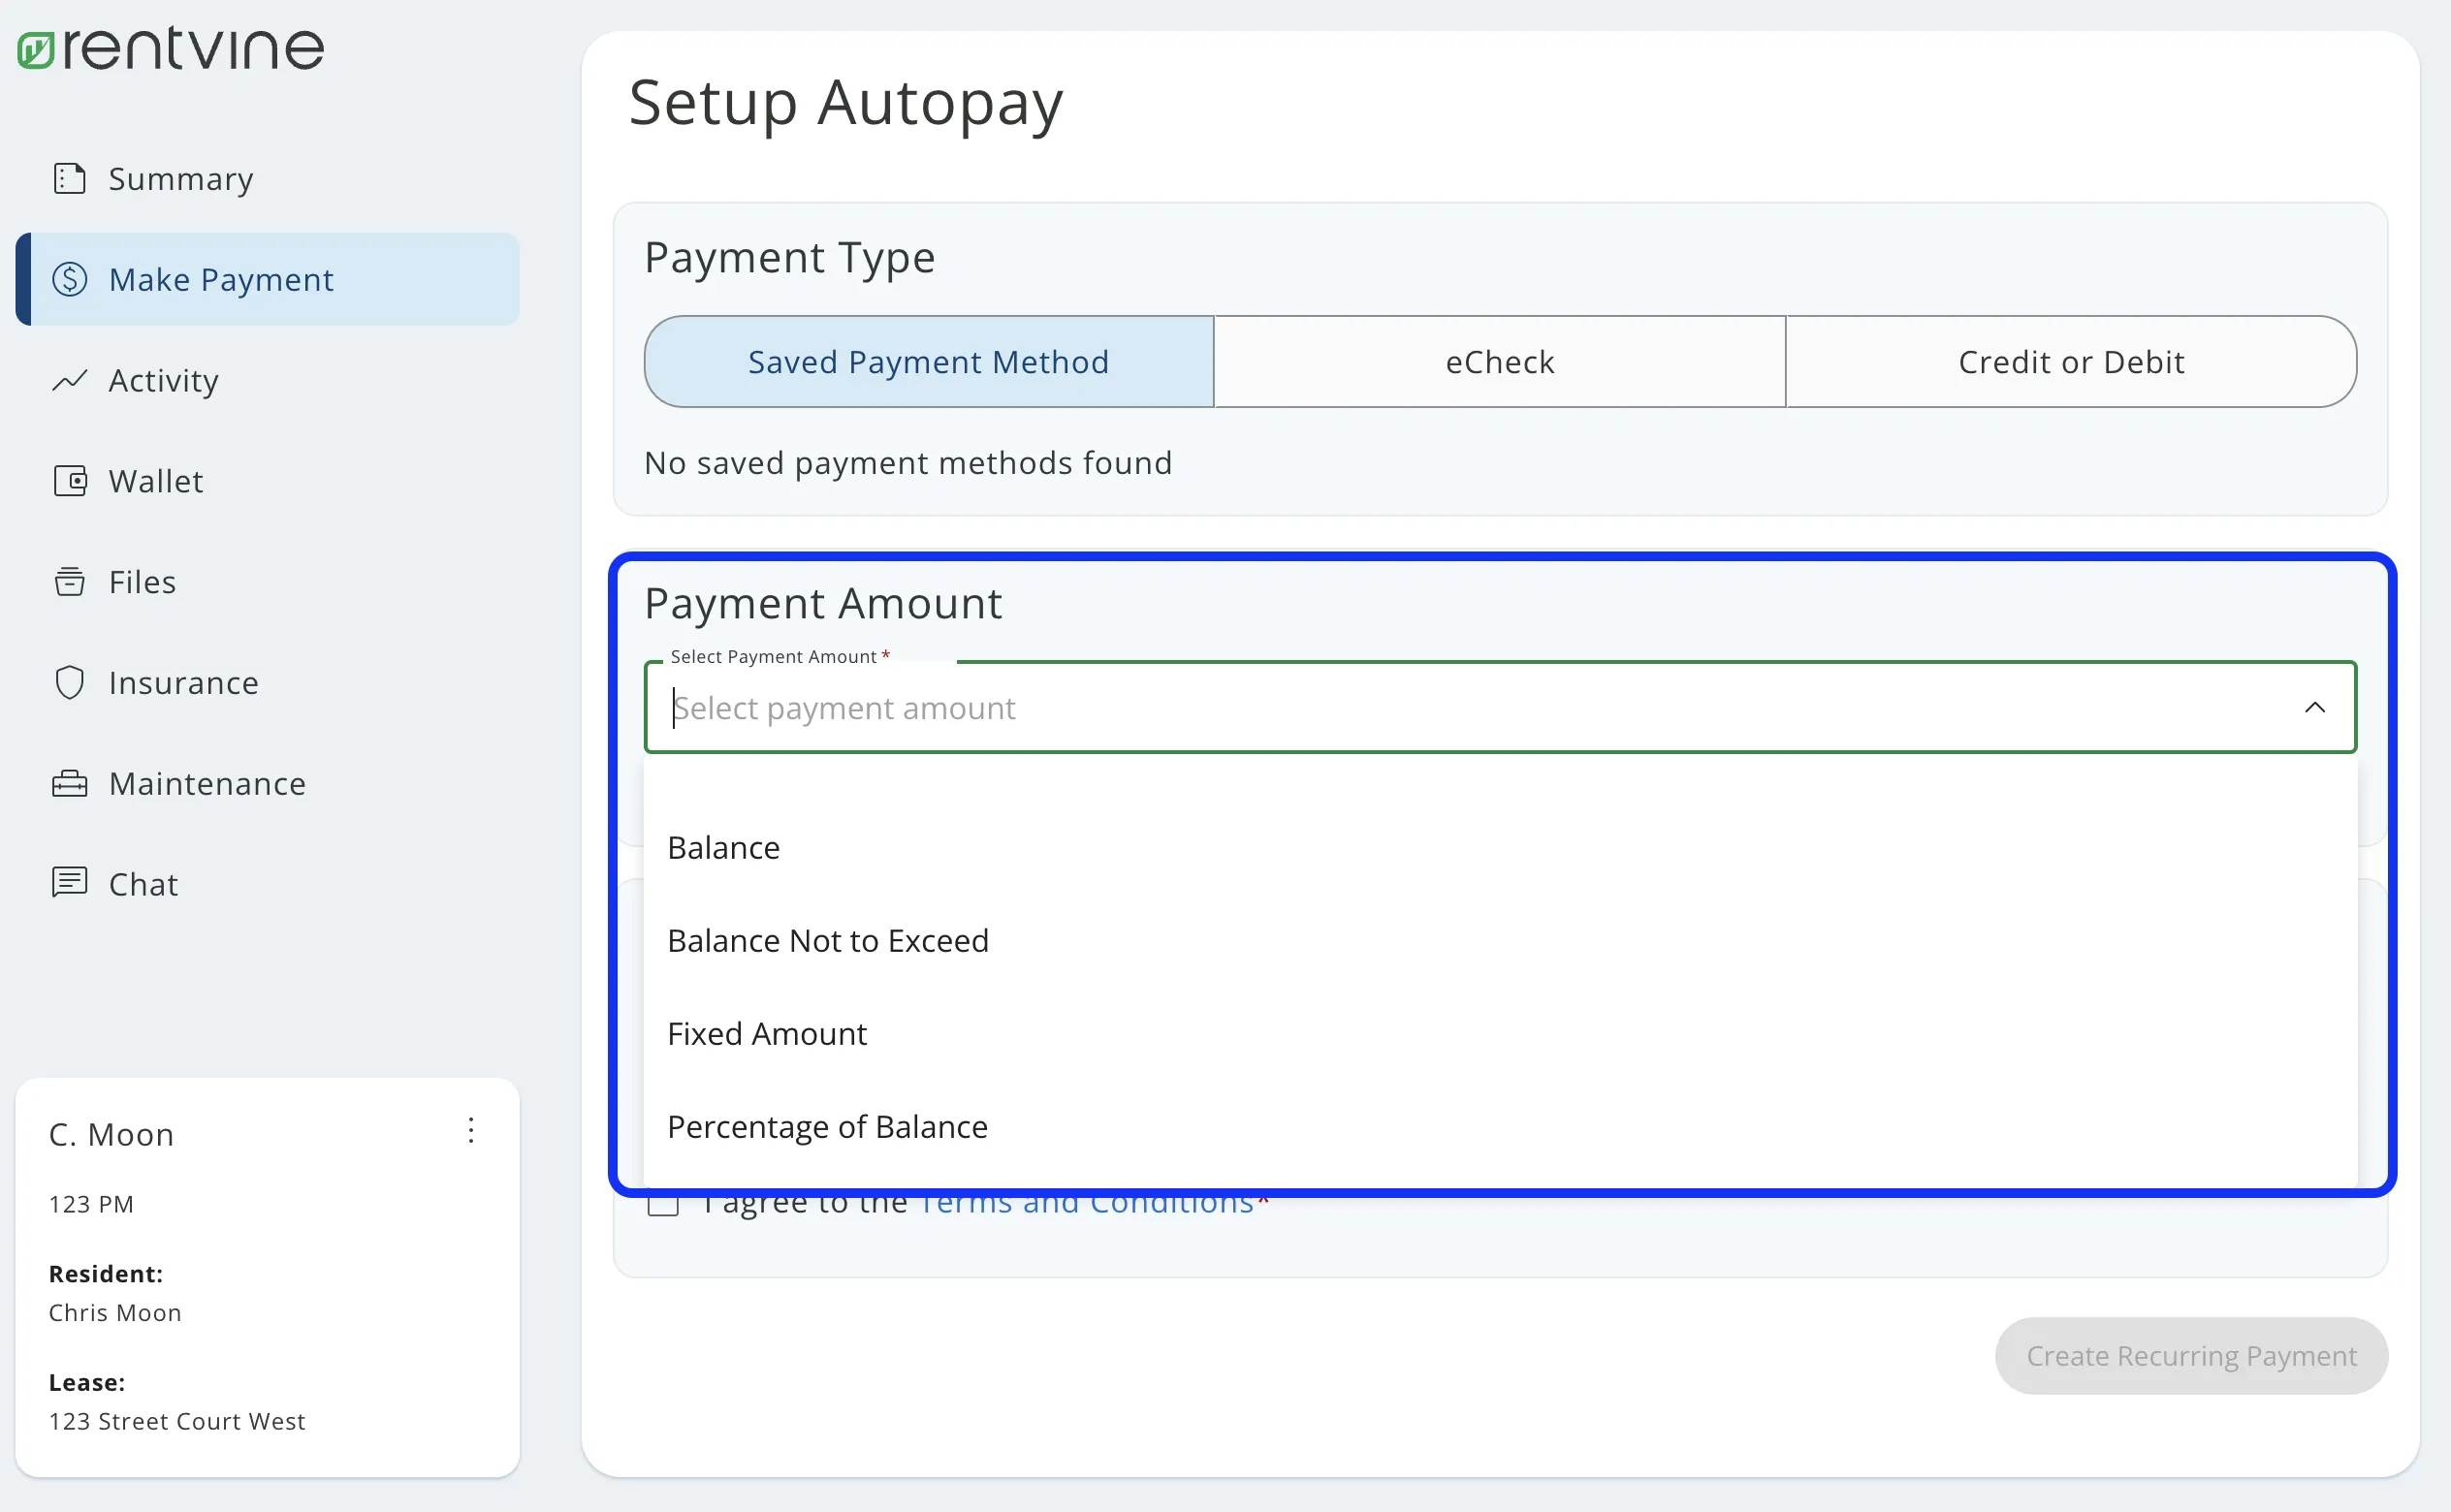
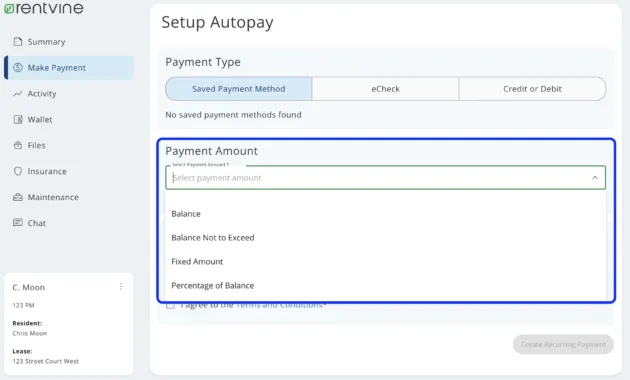
- 4. Select the Payment Amount
- 5. Set the Payment Date
- 6. Review and Confirm
- 7. Receive Confirmation
- Verifying That Autopay Works
- Check the First Transaction
- Monitor Your Statements
- Set Up Alerts
- Security Considerations When Using Autopay
- Common Pitfalls and How to Avoid Them
- Insufficient Funds in the Funding Account
- Changes to Account Details
- Overlooking Statement Date Shifts
- Paying Only the Minimum by Accident
- Best Practices for Managing Autopay Over Time
- How to Modify or Cancel Autopay
- Modifying Autopay Settings
- Canceling Autopay
- Real‑World Example: From Activation to First Payment
Setting up autopay for your credit card can feel like a small victory in the broader quest for financial organization. When you first hear about autopay, the idea of delegating a recurring task to a computer may seem impersonal, but the reality is far more practical. By automating monthly payments, you remove the risk of late fees, safeguard your credit score, and free up mental space for other priorities.
Imagine a typical month: bills arrive, receipts pile up, and the calendar reminder for the credit‑card due date flashes on your phone. In the past, you might have rushed to log in, locate the balance, and scramble for a check or online transfer. With autopay configured, that entire process disappears. The payment is triggered automatically on the date you choose, using the funding source you trust.
This article walks you through the entire journey—from understanding the options your issuer offers to verifying that the system works as intended. It also covers security considerations, common pitfalls, and best‑practice tips that keep your account safe while you enjoy the convenience.
Why Autopay Is Worth the Setup
Before diving into the technical steps, it helps to recognize the tangible benefits that autopay brings to everyday financial life.
- Eliminates late fees: Payments are processed on the exact due date you set, preventing costly penalties.
- Protects your credit score: On‑time payments are a major factor in credit scoring models; autopay helps you stay consistent.
- Saves time: No need to log in each month; the system handles the transaction silently in the background.
- Reduces stress: Knowing a payment will be made automatically lowers the mental load of tracking multiple due dates.
- Improves budgeting: By scheduling payments, you can align them with cash flow and avoid accidental overspending.
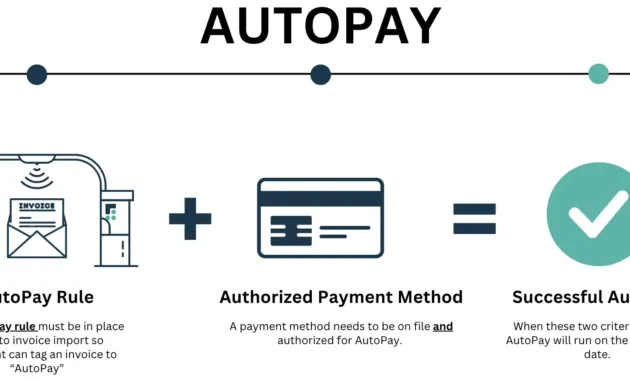
Understanding the Types of Autopay Options

Credit‑card issuers typically provide several autopay configurations. Choosing the right one depends on your spending habits and financial goals.
Full Balance vs. Minimum Payment
Most issuers let you select either the full balance or the minimum payment as the amount to be automatically deducted. Paying the full balance each month eliminates interest charges, while paying the minimum keeps the account in good standing but may accrue interest.
Fixed Amount
Some platforms allow you to set a fixed dollar amount that is charged each cycle, regardless of the actual balance. This can be useful if you want to control cash outflow, but you must monitor the remaining balance to avoid a residual amount that could trigger a late fee.
Custom Schedule
While most autopay systems default to the statement due date, a few issuers let you choose an earlier date. Scheduling the payment a few days before the official due date provides a buffer for processing delays.
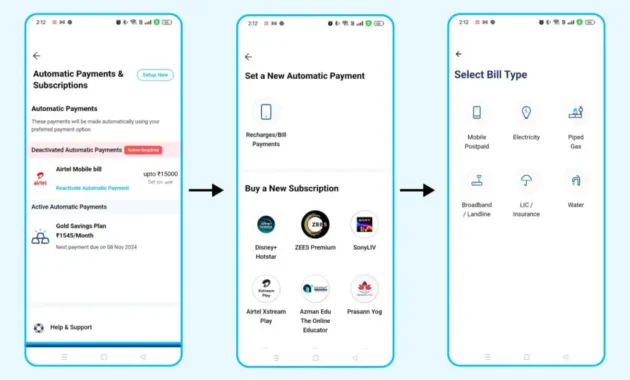
Step‑By‑Step Guide to Setting Up Autopay
Below is a detailed walkthrough that applies to most major credit‑card providers. The exact wording may vary, but the core steps remain consistent.
1. Log Into Your Online Banking Portal
Begin by accessing the secure login page of your credit‑card issuer. If you have never set up online access, you will need to register first. This process usually requires your card number, Social Security number, and answers to security questions.
2. Navigate to the “Payments” or “Autopay” Section
Once logged in, locate the menu item labeled “Payments,” “Bill Pay,” or “Autopay.” It is often found under the “Account Services” or “Manage Account” tab. If you cannot find it, use the portal’s search function and type “autopay.”
3. Choose Your Funding Source
Autopay draws money from a linked bank account, checking account, or sometimes from another credit card. Select the account you wish to use, ensuring it has sufficient funds to cover your typical monthly balance. If you need to add a new bank account, you will be prompted to provide the routing and account numbers and may need to verify ownership through micro‑deposits.
4. Select the Payment Amount
Decide whether you want the system to pay the full balance, the minimum amount, or a custom figure. For most users aiming to avoid interest, the full balance option is recommended. Make your selection, then confirm the amount.
5. Set the Payment Date
Choose the date you want the payment to be processed. The safest choice is the statement’s official due date, but you may select a few days earlier if your issuer permits. Confirm the date, keeping in mind weekends and holidays that could shift processing.
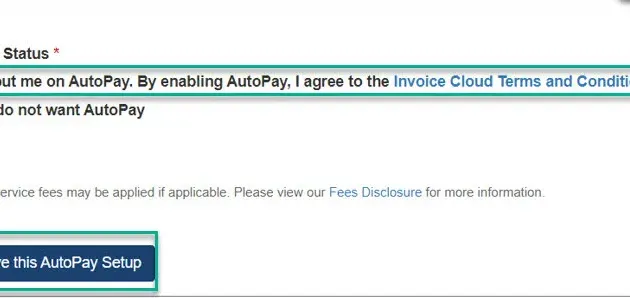
6. Review and Confirm
Before finalizing, the portal will present a summary of your autopay settings: funding source, amount, and date. Carefully review each line. Most systems require you to click a “Confirm” or “Activate Autopay” button. Some issuers may ask for a one‑time authentication code sent via SMS or email.
7. Receive Confirmation
After activation, you should receive an email or in‑app notification confirming that autopay is set up. Keep this confirmation for your records. It often includes a reference number that can be used if you need to modify or cancel the service later.
Verifying That Autopay Works
Setting up autopay is only the first half of the story. Verifying that the system functions as expected protects you from hidden errors.
Check the First Transaction
When the first scheduled payment processes, log back into your account and verify that the amount was correctly debited from your chosen funding source. Compare the transaction date with the date you specified.
Monitor Your Statements
For the next few billing cycles, review each statement to ensure the payment was applied before the due date and that no residual balance remained. This habit also helps you spot any unexpected fees.
Set Up Alerts
Most issuers allow you to enable email or SMS alerts for upcoming payments, successful transactions, or low‑balance warnings on the linked bank account. These alerts serve as an additional safety net.
Security Considerations When Using Autopay
Automating payments introduces a layer of trust between your financial institutions. Maintaining security is essential to prevent unauthorized withdrawals.
- Use Strong, Unique Passwords: Your online banking credentials should be difficult to guess and different from other accounts.
- Enable Two‑Factor Authentication (2FA): Whenever possible, add a second verification step such as a text message code or authenticator app.
- Keep Your Banking Apps Updated: Software updates often contain security patches that protect against new threats.
- Review Linked Accounts Periodically: Ensure the bank account connected to autopay is still yours and that you recognize all linked accounts.
- Report Suspicious Activity Immediately: If you notice an unexpected charge, contact your issuer right away.
For a deeper dive into keeping your credit‑card information safe, see our guide on updating your credit card contact info securely.
Common Pitfalls and How to Avoid Them
Even with a straightforward setup, some users encounter issues that can disrupt the autopay flow.
Insufficient Funds in the Funding Account
If the linked bank account lacks enough money on the scheduled payment date, the issuer may reject the transaction, resulting in a late fee. To avoid this, maintain a buffer of at least one to two weeks’ worth of expenses in the funding account.
Changes to Account Details
Bank account numbers, routing numbers, or even the credit‑card account itself can change due to mergers or re‑issuances. When that happens, you must update the autopay settings promptly. Failure to do so can cause missed payments.
Overlooking Statement Date Shifts
Credit‑card billing cycles sometimes shift because of holidays or processing delays. If you have autopay set to the exact due date, a shift may cause the payment to occur after the new due date. Regularly check your statement for any date changes.
Paying Only the Minimum by Accident
Some users unintentionally select “minimum payment” when they meant “full balance.” Review your autopay preferences after each statement to ensure the correct option remains selected.
Best Practices for Managing Autopay Over Time
Autopay is not a set‑and‑forget tool; periodic review keeps it aligned with your financial situation.
- Quarterly Review: Every three months, log in and verify that the funding source, payment amount, and schedule still match your needs.
- Align With Paychecks: If your income timing changes, adjust the autopay date to coincide with when you receive funds.
- Use Multiple Funding Sources: For added security, consider alternating between two bank accounts each billing cycle. This reduces the impact if one account encounters an issue.
- Keep a Manual Backup: Even with autopay, make a habit of reviewing your statement and, if possible, make a small manual payment a few days before the automated one. This ensures the system is working and gives you a chance to catch any discrepancies.
How to Modify or Cancel Autopay
Life changes—jobs, relocation, or new financial goals—may require you to adjust or stop autopay.
Modifying Autopay Settings
Log into your portal, navigate back to the autopay section, and select “Edit” or “Change Settings.” From there you can switch the funding account, change the payment amount, or move the payment date. Save the changes and look for a confirmation message.
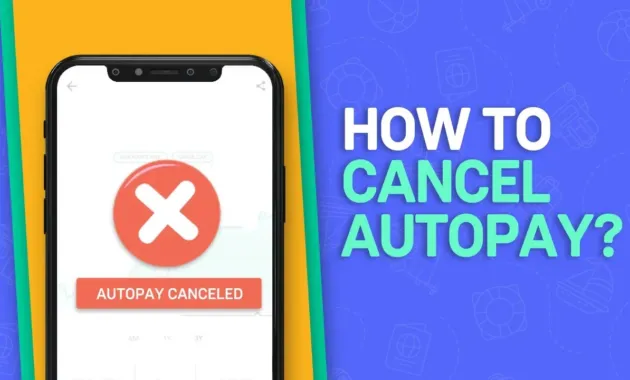
Canceling Autopay
If you decide to stop autopay altogether, follow the same navigation path and choose “Cancel Autopay.” Most issuers will ask you to confirm the cancellation and may offer a reminder to set a manual reminder for future payments. Keep an eye on your next statement to ensure no automatic transaction occurs.
Real‑World Example: From Activation to First Payment

Consider the experience of a new cardholder named Maya. After receiving her first credit card, she read the Getting Started: Activation and First Use guide, which walked her through activating the card and setting a PIN. When her first statement arrived, Maya decided to set up autopay to avoid the hassle of remembering the due date.
She logged into the issuer’s website, selected “Payments,” chose her checking account as the funding source, and opted for the full‑balance payment on the 15th of each month. After confirming, she received an email receipt. The following month, the system deducted $842 from her checking account on the 15th, and the payment posted to her credit‑card account on the 16th—well before the 20th due date. Maya’s credit score remained steady, and she felt relieved knowing that the routine was taken care of automatically.
This scenario illustrates how a clear, step‑by‑step approach can make autopay feel like a natural extension of everyday financial habits.
By following the instructions outlined above, you can replicate Maya’s success and integrate autopay into your own financial routine.
Remember that autopay is a tool, not a substitute for overall financial awareness. Regularly reviewing your statements, maintaining a healthy cash buffer, and staying informed about any changes to your credit‑card agreement will ensure the system works smoothly for years to come.